Cleaning the Cotton Candy Machine
Cleaning the Cotton Candy Machine
The cotton candy machine will need to be regularly cleaned to ensure no buildup of sugar that will affect the quality of the cotton candy it produces and eventually even cause the machine to break down. How often the machine needs to be cleaned depends heavily on usage, but on average the machine will need to be gently cleaned once every three days of use, and more heavily cleaned every week of use.
If the machine experiences heavy activity on a daily basis, it may need to be deeply cleaned more regularly - it is better to clean more often than not enough!
Gentle Cleaning
The entire interior of the cabinet where the cotton candy is made should be wiped down with a warm, damp cloth to remove any sugar residue that will be on every surface in this space. Take special care to wipe down all three plexiglass portions of the cabinet. Ensure that the surface of the shaping knife at the top of the cabinet is also free of candy residue. Do not use soap for this process, as this will affect the taste and quality of the product.
After all surfaces are sugar-free, wipe them all down again with a dry cloth to remove any moisture from the inside of the machine.
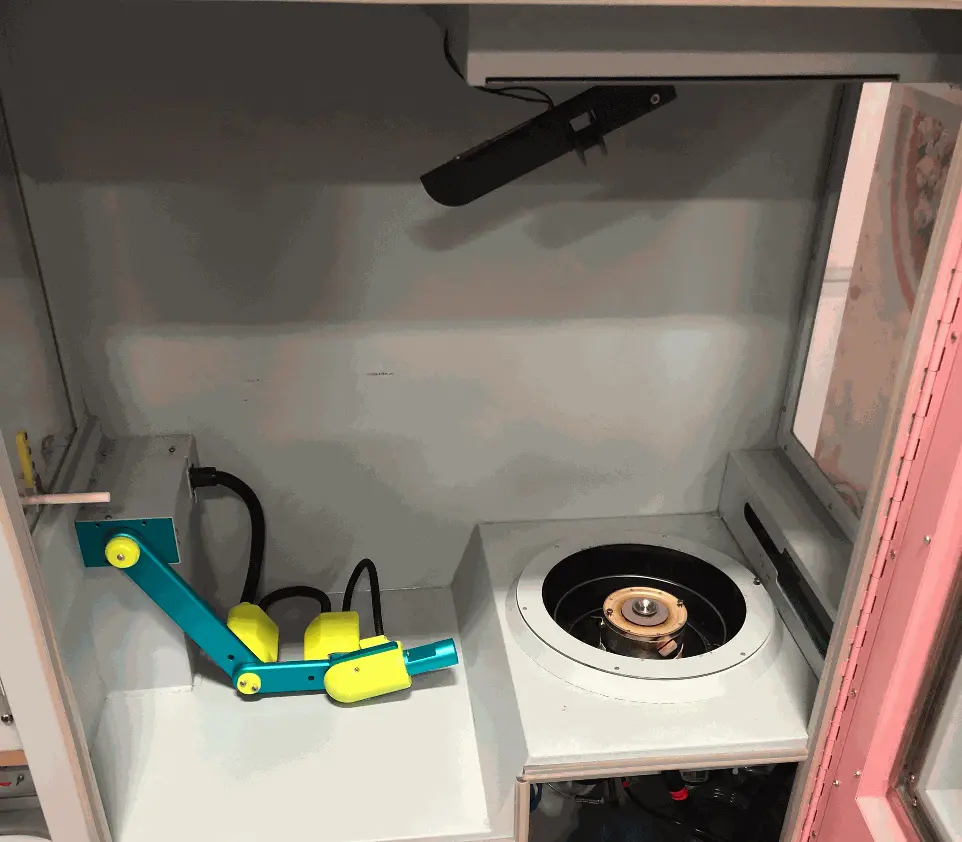
All surfaces exposed to errant sugar from the production of the cotton candy should be wiped down and dried before resuming operation of the machine.
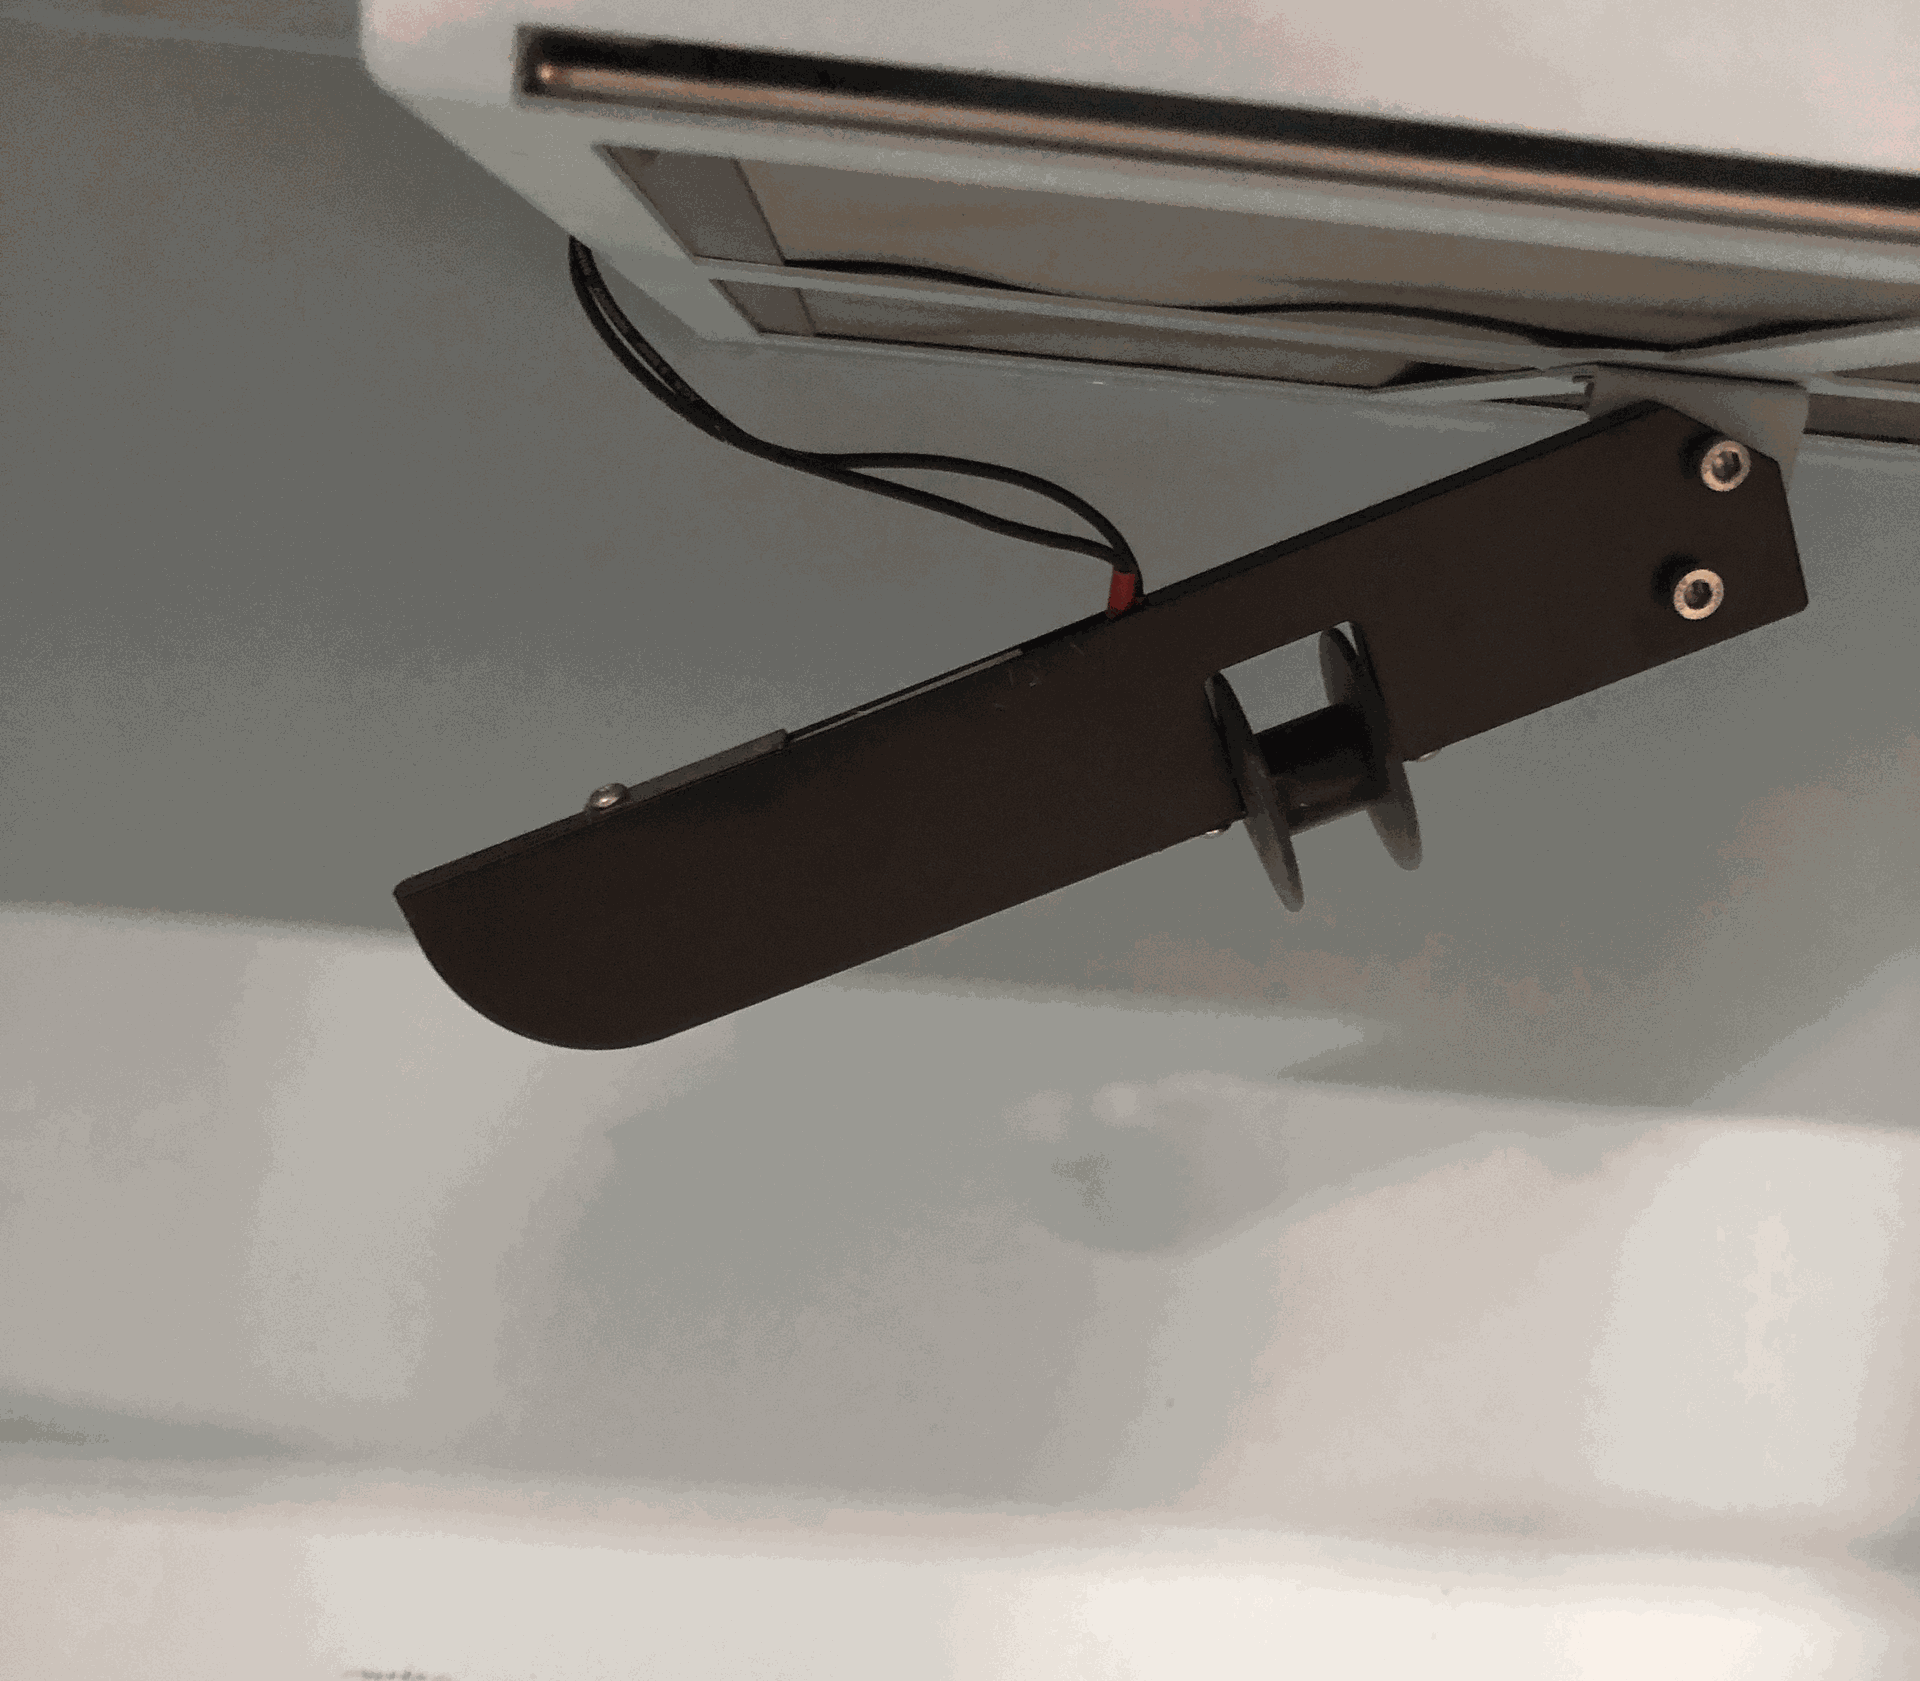
Ensure that the shaping knife is also free of any sugar residue.
Deep Cleaning
The machine also needs to be deeply cleaned with some regularity to prevent sugar buildup from restricting machine functions and eventually preventing the machine from properly dispensing any product.
Before performing any deep cleaning procedures, turn the machine off and allow for at least 30 minutes to pass to allow machine to cool down for maintenance.
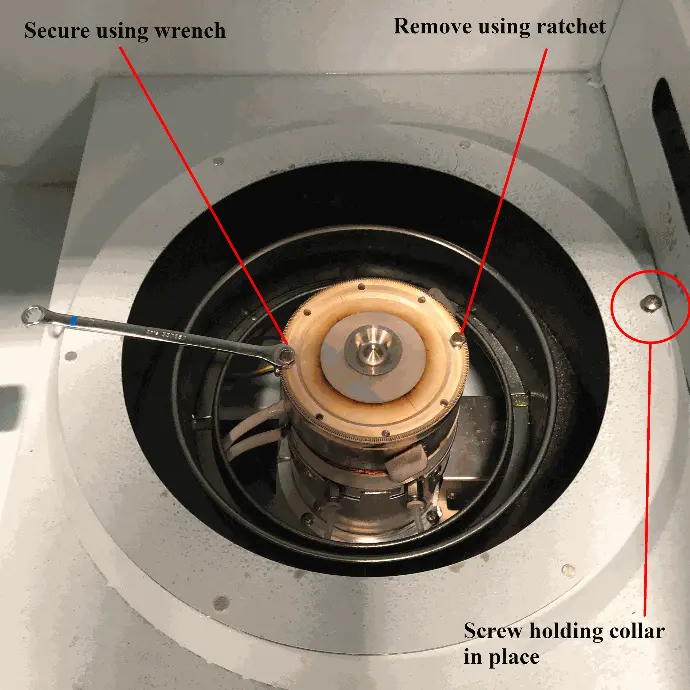
To do this, the apparatus which spins the cotton candy must be disassembled in order to ensure no buildup occurs within it. To do so, remove the collar around the assembly - this is held in place with a single Phillip's head screw located on the right side of the collar.
Then, the top portion of the spinner will need to be removed. It is held in place with 7mm (~1.4 inch)bolts. These bolts can be removed with a drill with a 7mm socket, or by securing the spinner in place using a 7mm wrench and remove the bolt opposite it using a 7mm ratchet or similar, as shown in this image.
Once all bolts are removed, the top portion of the spinner can be removed, allowing the lower portion of the spinner to be cleaned as well.
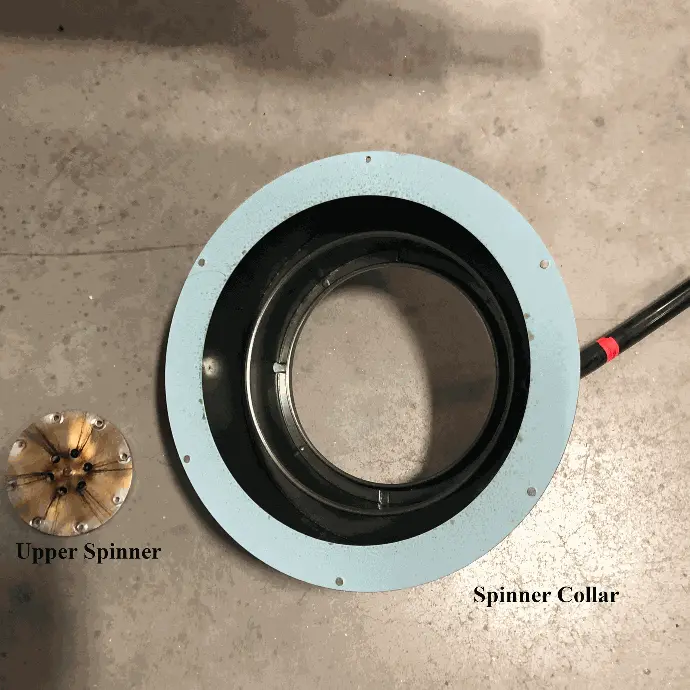
Once disassembled, the collar and both halves of the spinner need to be scrubbed down to remove any residue, which is often burned and caked on from the heat of the spinning process. Remove the superheated sugar from these surfaces using a washcloth, scrubber, or even 400 grit sandpaper if the material is thoroughly caked on.
There should be no browned or blackened material on the collar or either half of the spinner, nor should any of the surfaces have a rough texture from the feeling of sugar residue.
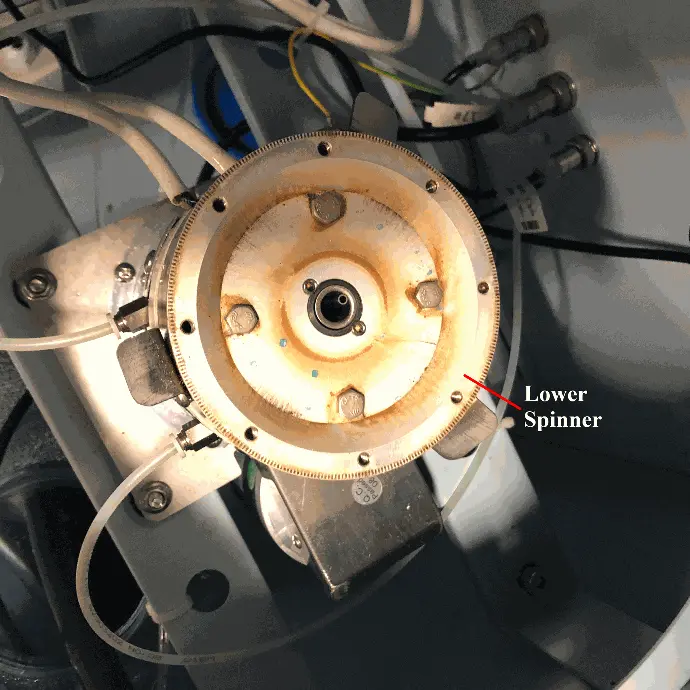
The lower potion of the spinner may have impressions of the teeth from the upper portion of the spinner, these should be scrubbed off to ensure smooth operation.
Once all surfaces are cleaned, the spinner must be reassembled. To do so, screw in a bolt a few turns - do not tighten it. Screw in a bolt opposite the circle from the first one a few turns. Repeat this process, for the remaining bolts. Once all bolts are in place, tighten them, again tightening the bolt opposite the one last tightened wherever possible.
Once the spinner is reassembled, reinstall the collar on top of it, ensuring that the tube coming from it leads to the waste water container below the spinner.
While deep cleaning, it is best to double check there are no issues with several other locations within the machine.
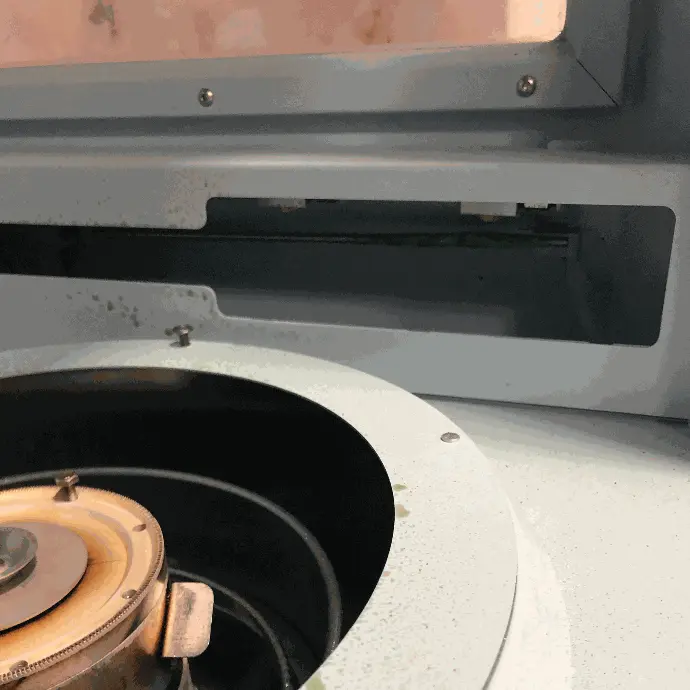
Heated Candy Catch
This metal rod is tucked away to the right of the candy spinner. Ensure there is no caked on sugar on or around this part.
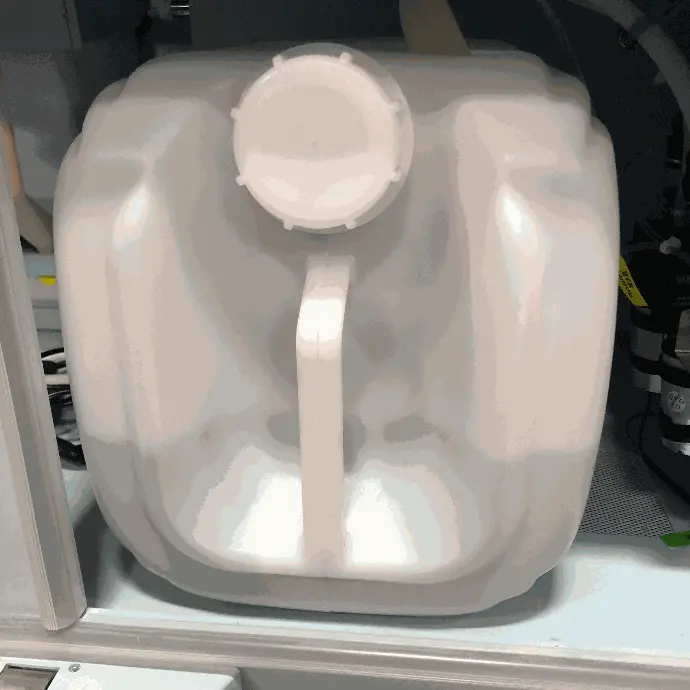
Clean Water Container
Located below the straw arm, ensure that the container here is at least three quarters of the way filled with clean water.
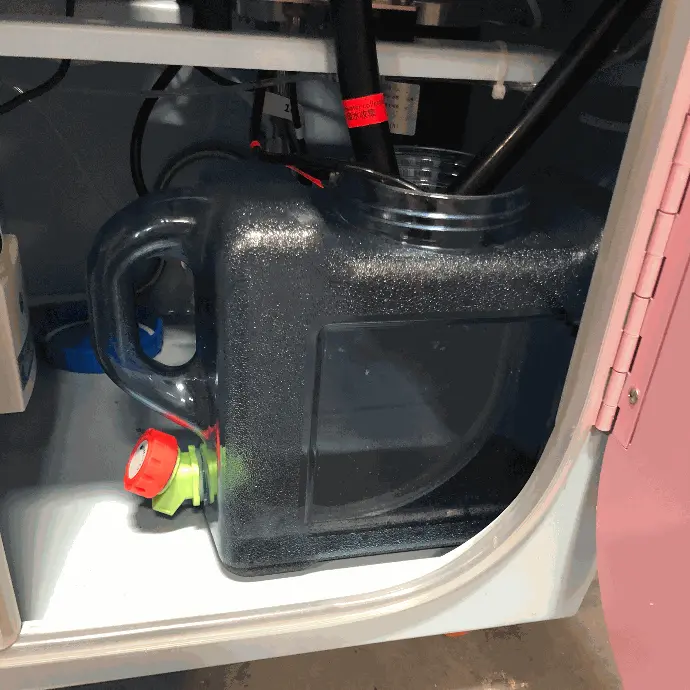
Waste Water Container
Located below the spinner, this stores waste water from the machine. Empty it out of any liquid to prevent any odor buildup.
Didn't find what you were looking for?
Feel free to reach out to our esteemed technical support department to answer any questions you may have over the phone at (719)-301-4648 or over email at tech@remarcvending.com or you can fill out a support ticket to the right.
Didn't find what you were looking for?
Feel free to reach out to our esteemed technical support department to answer any questions you may have over the phone at (719)-301-4648 or over email at tech@remarcvending.com or you can fill out a support ticket to the right.